Close
Close
Advanced Search

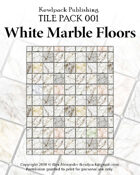
TilePack 001: White Marble FloorsClick to magnify
Quick Preview
/gs_flipbook/flip.php?xml=/demo_xml/262509.xml&w=500&h=312
Full‑size Preview
https://watermark.drivethrurpg.com/pdf_previews/262509-sample.pdf

TilePack 001: White Marble Floors

ADD TO WISHLIST >

This product contains a collection of 8x10 high resolution printable tile sheets that can be used to create custom tiles of virtually any* shape/size. Compatible with any 1" scale grid game system (i.e. D&D).

TILEPACK INCLUDES:

  • Base Tile standard**
  • Base Tile offset***
  • Variants (Splats) 01-03 standard
  • Variants (Splats) 01-03 offset
  • Old Black Bricks

- HOW TO USE -

TILES:

  • Print tile sheet at full size using any color or b&w printer.
  • Mount/Paste to your substrate (usually cardboard, chipboard, or XPS foam).
  • Cut to desired size using a sharp utility or xacto knife (cardboard/chipboard) or wire table (XPS foam) if you have one.

WALLS (BASIC):

  1. Print wall sheet at full size using any color or b&w printer.
  2. If you're only putting texture on the top of the walls, just mount the texture to the wall substrate and cut strips of appropriate width (1cm recommended) and length.
  3. Hot glue wall strip to tile face, along whichever side(s) need a wall.

WALLS (ADVANCED): 
If you're doing fully textured/finished walls, it's a bit more involved. I'll try to put a video together or post some pics for illustration at some point.

  1. Using XPS foam, cut strips to 1cm x 1cm x 10".
  2. Cut the wall texture into strips of 2.5cm x 10".
  3. After applying glue stick to back of texture, carefully wrap the texture strip around the XPS foam strip, one side at a time, making sure to press firmly (but not too much) so it adheres well to the foam. You may have to hold each side for 30-60 seconds until it stays put. The texture will cover 2 sides (top and inner wall) completely and about half of the third side (outer). The untextured bottom side will be glued to the tile face.
  4. Hot glue the wall strip (untextured bottom side down) to the tile where you want the wall. The top and inner sides of the wall should be fully covered by the texture, while the outer side is partially covered.
  5. Once all walls have been glued to the tile, print/cut some outer wall trim strips that are as wide as the outer tile edge is tall (from the bottom tile edge to the top wall edge). Example: If using 1.5cm (i.e. 1/2" XPS foam), this will be 2.5cm x 10" strips.
  6. Apply glue stick to back of outer wall trim strip and then carefully mount it around the outside edge of the tile. Make sure to keep the top edge of the texture flush with the top edge of the wall. Crease the corners as you wrap the texture around the tile so they are nice and clean.
  7. Trim any bottom edge overlap/overhang so that the bottom edge of the texture is flush with the bottom edge of the tile.
  8. The outer wall trim will be covering the openings on the tile. You can cut this away with an xacto knife OR do what I do... make a 1cm long cut of the texture vertically midway between each side of the opening, then along the edge where the texture meets the tile face. This will create a thin "flap" on each side that you can simply wrap snugly around each edge of the wall again, make sure those corners are tight and clean.

TIP/TRICK: Print all tile and wall textures onto full sheet mailing label stock that has permanent adhesive already applied. Then you don't have to worry about glue sticks or any mess. Peel, press, done.

  • *Any size can be achieved simply by gluing multiple full-size tiles together (edge to edge), then cut to desired shape.
  • **Standard (edge to edge grid starting at top left corner). Useful for non-walled, or outdoor tilesets where no offset is needed.
  • ***Offset (edge to edge grid with 1/2" offset starting at top left corner). Useful for walled, or indoor tilesets where an offset for the walls is desired (1cm X 1cm recommended).
pixel_trans.gif
pixel_trans.gif
 
 Customers Who Bought this Title also Purchased
pixel_trans.gif
pixel_trans.gif
Reviews (0)
Discussions (0)
Narrow Results
$ to $
 Follow Your Favorites!
NotificationsSign in to get custom notifications of new products!


Product Information
Author(s)
Artist(s)
Publisher Stock #
2018-001
File Size:
40.42 MB
Format
Original electronic Click for more information
Scanned image
These products were created by scanning an original printed edition. Most older books are in scanned image format because original digital layout files never existed or were no longer available from the publisher.

For PDF download editions, each page has been run through Optical Character Recognition (OCR) software to attempt to decipher the printed text. The result of this OCR process is placed invisibly behind the picture of each scanned page, to allow for text searching. However, any text in a given book set on a graphical background or in handwritten fonts would most likely not be picked up by the OCR software, and is therefore not searchable. Also, a few larger books may be resampled to fit into the system, and may not have this searchable text background.

For printed books, we have performed high-resolution scans of an original hardcopy of the book. We essentially digitally re-master the book. Unfortunately, the resulting quality of these books is not as high. It's the problem of making a copy of a copy. The text is fine for reading, but illustration work starts to run dark, pixellating and/or losing shades of grey. Moiré patterns may develop in photos. We mark clearly which print titles come from scanned image books so that you can make an informed purchase decision about the quality of what you will receive.
pixel_trans.gif
Original electronic format
These ebooks were created from the original electronic layout files, and therefore are fully text searchable. Also, their file size tends to be smaller than scanned image books. Most newer books are in the original electronic format. Both download and print editions of such books should be high quality.
File Information
Watermarked PDF Click for more information
Watermarked PDF

These PDF files are digitally watermarked to signify that you are the owner. A small message is added to the bottom of each page of the PDF containing your name and the order number of your purchase.

Warning: If any files bearing your information are found being distributed illegally, then your account will be suspended and legal action may be taken against you.

Here is a sample of a page from a watermarked title:

File Last Updated:
December 26, 2018
This title was added to our catalog on December 27, 2018.
Publisher
WOT Publishing